If there’s a cake that I’m very fond of, that would be the pineapple cake. It’s a classic in Chilean homes, many birthdays, afternoon tea time, meetings and celebrations that ended with a nice slice of this delicious recipe. My mother always prepared it, but I don’t know if it was exactly like the one I bring to you here today, because as you may probably know there are always versions or modifications of these homemade recipes. It is delicious to remember how a meal (a cake in this case) can bring so many great memories back, and it’s that fact that makes me understand the importance of what we serve at our tables, because that way we can create some history.
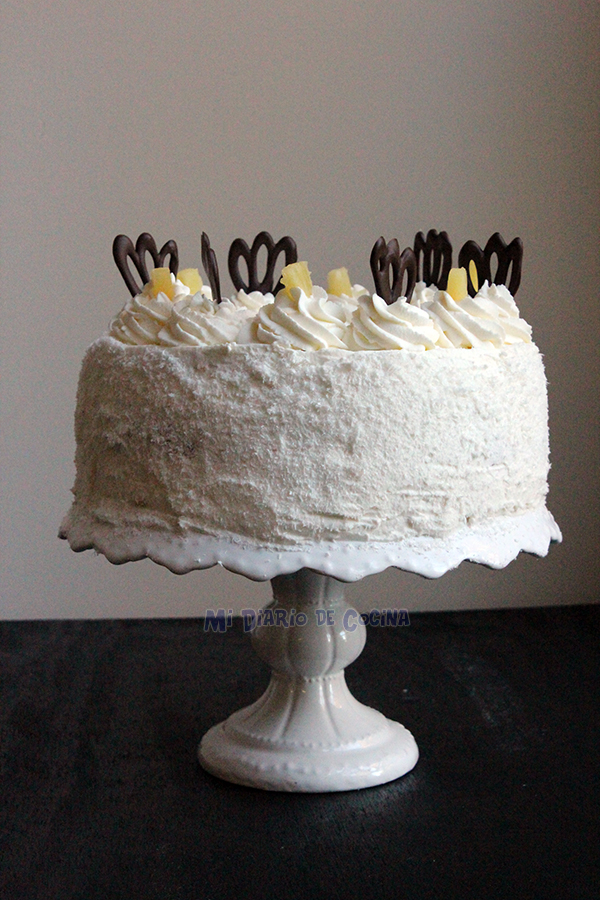
For this cake, if you would like to make one as tall as the one in the pictures below, I suggest you to make two simple sponge cakes. For the internal stuffing, I used layers of whipping cream, pineapples, and milk caramel (dulce de leche), but you can replace it with peach or apricot jam.

Pineapple cake
- Total Time: 1 hour 25 mins
- Yield: 20 1x
Ingredients
- FOR 1 SPONGE CAKE BASE:
- 6 eggs at room temperature
- 1 cup of granulated sugar
- 3 tablespoons of cornstarch
- 3 tablespoons of flour
- 2 teaspoons of baking powder
- 4 tablespoons of cold water
- FOR THE FILLING:
- 1 liter of whipping cream
- 3/4 cup of powdered sugar
- 1 cup of diced pineapple
- 1 cup of milk caramel (dulce de leche), or peach or apricot jam.
- FOR MOISTENING THE SPONGE CAKE:
- 3/4 cup of water, or alternatively you can use pineapple juice (if using canned pineapple)
- 1/2 cup of granulated sugar
- 1 tablespoon of vanilla extract
- FOR THE DECORATION:
- Grated coconut, or chocolate chips
- Melted chocolate chips to make figures
Instructions
- Preheat the oven to 350°F (180°C).
- Prepare a cake mold of 24 cms (9 inches), which should be buttered at the base and sides.
- In a bowl or in the mixer, beat the 6 egg whites vigorously. After about 2 minutes of mixing, start gradually adding the granulated sugar until the mix thickens.
- Then add the egg yolks one by one. Beat until well blended.
- Then, in a separate bowl, mix the flour, cornstarch and baking powder.
- Slowly add the dry ingredients to the mixture, and with the help of a wooden spoon or spatula, make “surrounding” movements, so that the mix gets enough air.
- Add the spoonfuls of water. Join the mixture carefully, and then transfer it into the mold.
- Bake for 25 minutes.
- You should check if the cake is cooked in the center with the help of a wooden skewer. If it comes out dry, that means that the sponge cake base is ready.
- Once ready, let the cake cool down.
- Once the cake is cool, divide it into 3 equal parts (through its thickness, so that you get 3 circles). And if for some reason the cake didn’t rise enough during baking, you can make one more sponge cake base.
- Then, in a bowl, beat the cream until it gets the proper thickness, and then add the powdered sugar to it.
- Prepare the moistening mix by mixing water with sugar and vanilla extract.
- Moisten the first part of the cake well enough, and also on the sides.
- Add a generous layer of cream, and then some chopped pineapple on top of it.
- Then place the next layer of sponge cake on top, moisten it a little bit (just like the previous layer), and spread milk caramel (dulce de leche) or jam on top of it.
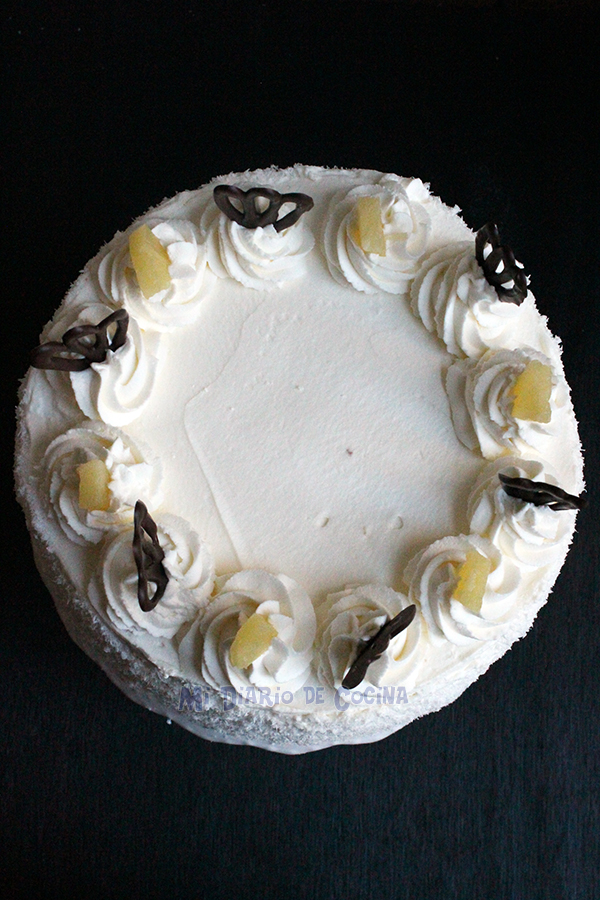
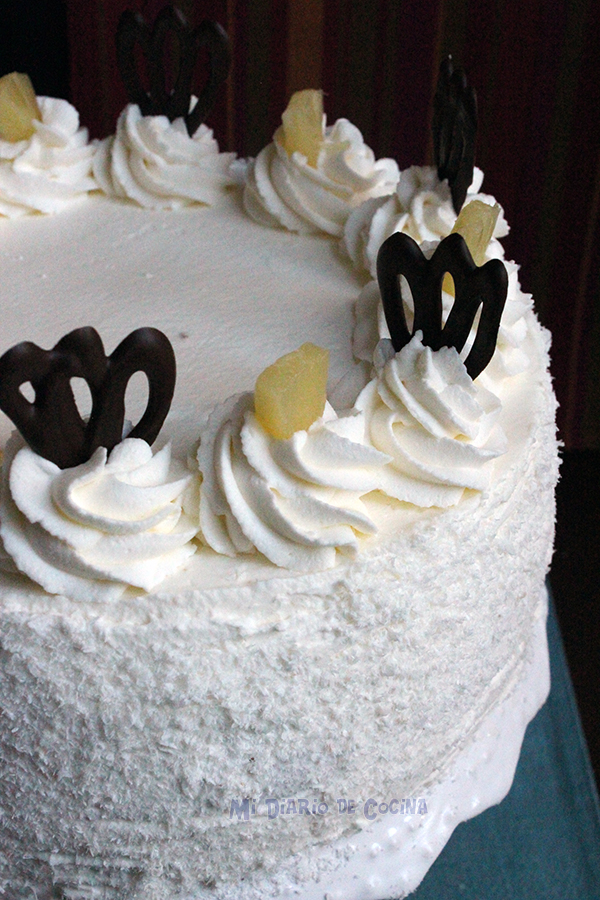
- Place the last sponge cake layer, moisten it enough again, and thoroughly spread cream on top of it, as well as on the sides of the cake.
- Leave some cream aside, so that you have enough to make a decoration to your liking over the cake.
- On the sides of the cake, you may very carefully cover them with grated coconut or chocolate shavings.
- For the chocolate chips, you can melt them in the microwave for 40 seconds. And with the help of a pastry bag or a Ziploc bag, you can make figures over parchment paper. Then place the chocolate figures into the freezer for a minute, and that’s it, there will figures that you can use to decorate your cake.
- Ideally, try to make the cake the day before, so that it achieves the correct consistency and mix of flavors.
- Prep Time: 60 mins
- Cook Time: 25 mins


Can I make the whipping cream filling a couple days in advance and put it in the fridge?
Not really, ideally you would like to make it slightly before adding it to the cake.
I don’t know what happened but the cake rose and then fell flat when I took it out of the oven. I remember my mom making this cake when we were little and wanted to try it. I ended up making a regular bizcocho from the back of a cake flour box because is the only flour I had left, otherwise I would’ve attempted to make another bizcocho. I did use your recipe for the cream and remojo. I’ve had my regular cake in the fridge for more than 4 hrs now. Let’s see what happens. I’m just sad it won’t have the authentic Chilean flavor.